Monday, November 4, 2013

October 2013 Stampers Groups Projects

I have been meaning to do this Black Magic technique with my stampers groups for a while now, but then SU went and retired their water color pencils ! Its a great technique, and you can use any soft hb pencil, or chalk etc to do it. Using white craft ink (and allowing to fully dry) essentially turns dark cardstock into white where you have stamped, enabling you to color them in. Depending on your coloring technique, the colors you use and products, it can be really vivid on the dark cardstock. We stamped the flowers using the Secret Garden stamp set, colored with watercolor pencils and added pearls to the flowers. The sentiment is from Fabulous Phrases and we used one of the banner dies from the new SU thinlets label card die. The dsp is Modern Medley. I had to use a paperclip to keep the card closed so you can see the dsp behind the card, but took another pic of it open :)


The second CAS card was all about the bling ! We used SU's illuminate glimmer stamp to stamp snowflakes from the Snowflake Soiree stamp set onto the whisper white card stock (see close up pic below). It gives a beautiful frosted, shimmery look to the snowflakes. Tip : make sure its dry before you touch it or it will smudge.

The sentiment, also from Snowflake Soiree (don't you just love when a stamp set contains images and words !!!! ) was stamped onto whisper white card  stock, then the whole piece of card stock was covered in versamark ane embossed with iridescent ice embossing folder, effectively turning it into glimmer paper. LOVE it. Its a great way to add bling and dazzle that wont come off everywhere - glitter can be problematic.

Finally we used Winter frost dsp, for layering and the envelope - which was made with the wonderful new envelope punch board, some island indigo card stock and silver 1/8 ribbon.


September 2013 Stampers Group projects

My stampers groups are underway again, I have 3 groups this year, lots of scrapbookers and card makers, so I am having to think outside the box to keep everyone happy :) Lots of techniques, tools and products that can be used for all paper crafting hobbies.

In September we did a little bit of a mixed media look with a tag :


The techniques were sponging and emboss resist.

Firstly the writing was stamped in early espresso using the En francais background stamp onto very vanilla card stock. Then when it was fully dry (make sure it is unless you will have brown words stamped in your clear versamark !!!) we used the leaf stamp from the Papaya Collage stamp set with versamark. This was then embossed with clear embossing powder. Then we sponged over the whole tag in Old Olive, Calypso Coral and Marina Mist. The ink only sticks to the card stock, the embossing resists the ink, hence the lovely very vanilla leaves you can see :) We sponged the edge of the tag with early espresso, and added very vanilla seam binding and the For You stamp from Chalk Talk stamp set. It was punched with a circle punch and we used the modern label punch and a few pearls.

A ribbon tip : When using seam binding, you can spritz it with water and crumple it up, when its dry it keeps some of that crumpled look, which I happen to like on distressed/mixed media art :)

The other project was using the Papillion Potpourri stamp set and co-ordinating punch.


I like the simplicity of this CAS card. I used I am me dsp, and rhinestones which were colored with sharpie markers to co-ordinate with the colors of the stamped and punched layered butterflies. The shape at the bottom of the card was handcut, to suit the sentiment that people chose from the Loving Thoughts stamp set. This was done by holding the two pieces of cardstock (the dsp and smaller white front) together so that the bottom edges lined up. The white piece was centred. Then we cut both together in one swift movement. When we moved the white up to the centre of the dsp, the cuts are identical. Hope that makes sense - its easy to do, but difficult to explain !

Hope you like it :)

ATC : SHE art

What a great title, I enjoyed doing this one, but have to admit I did not draw my girl ! Thank you Prima for creating the perfect sized doll stamp for my ATC ! lol


As mentioned, doll stamped with a Prima doll stamp. Then the paper piecing began... Anyone who knows me, knows how I love to fussy cut and paper piece. Weird I know ... lol

I stamped her dress, covered it in gel medium and then used my faber castell india ink big brush artist pen to add some texture and dimension to the dress in blue. Everything was paper pieced, the jacket, arms and face. It was only the hair I left and colored in. The headband I made up and cut out of glimmer paper. The background is sponged with distress ink and doodled with a white gel pen, the little brown rhinestones added and the words.

The whole point of this ATC really is, we only live one, so we may as well be fabulous ....

The other wonderful creations :

ATC : Travel

Hmmmm another thought provoking ATC title .....

I have this wonderful Hero Arts travel set for the background, which I stamped in versamark and embossed in clear powder. I distressed the edges. The Tim Holtz travel airplane stamp was stamped on clear shrink plastic and heated, reducing it to about 1/6th of its size. It is loose and makes a wonderful embellishment. I used the red and blue bakers twine for an airmail look. So a simple ATC, but very enjoyable :)

These are the other Atcs made by the talented ladies I share this 'hobby' with.

Note : The balcony ATC is actually Juliets balcony, when Romeo is serenading her. The background is made of sand - sooo cool. The maker had just been there on vacation.

ATC : Snap

My choice this month, and I decided on Snap !

 I wanted to do the card game snap, so I made my ATC on an actual playing card base, with mini cards on the front. Lots of gel medium, liquid pearls, gold embossing powder and doodling in the background.

And these are all of the ATC's for Snap :
This title resulted in such varied interpretations, cards, dressing, camera and angry birds. A good ATC title I think :)

ATC : Lucky

What an interesting ATC topic .... had to think about this one. That is one of the main things I enjoy about ATC's, it is essentially a mini work of art, you have to decide what to do based on the topic, then make the magic happen on a 2.5 x 3.5" canvas !!! I just love the challenge.

The title was 'Lucky' and we were supposed to include the Canadian penny, which is sadly being phased out.
 I did a digital print of a rainbow and added the Irish saying :

May you always walk in sunshine
May you never want for more
May Irish Angels rest their wings
Right beside your door.

Whilst the ink was still wet I added some clear embossing powder and heated it to highlight some of the colors. It only adhered to some parts, which I loved even more !

The pot was punched from a circle punch and the top punched out with the same punch, I added inca gold to the pot. The shiny penny was inserted with stickles to eminate the gold sparkle of the pot of gold at the end of the rainbow.

Finally the horsheshoe was punched and embossed with Stampers Anonymous aged embossing powder.

And here it the other ATCs for this topic : How fab ..... Love it .....


ATCs : Love Songs

I really enjoyed this ATC, it was to make an ATC from a favourite song with love in the title.
 Mine of course had to be a Beatles song 'All you need is love'.

The background was made by rubbing various colors of distress ink onto my craft sheet, spritzing with water and running the cardstock through it. I love the moody look of the sky - if you've been to Liverpool you can relate to the authenticity of the skyline ! lol.

The Liverpool skyline silhouette was cut using a cricut. I had actually made a stencil and sprayed silver with a homemade spray the black cardstock before it was cut - just to give it some texture and interest.

I covered the 2.5 x 3.5" ATC with tin foil, which I crumpled first. I wanted to created the feeling of movement in the water, added interest to the reflection of the Liverpool skyline. I used copic markers to color the water and skyline reflection.

I printed the words from my computer and adhered.

So many steps, but I love the reflective quality of this ATC, the interest and textures.

These are the four Love Songs ATC I now have. Love the girls in my ATC group, so much talent :)


Computer issues

If you are wondering why there haven't been any posts for a while, its not anything to do with me, the culprit was my pc ! grrrrr .....

The motherboard on my pc decided enough was enough and she wasn't playing any more ! So began the search for, acquisition of and set up of the new computer: A Mac no less ! So I should also add the re-education .... lol

I am still learning, but am LOVING my new computer. The Mac is very intuitive for the most part. The photo option I am still trying to figure out, especially uploading to the blog and tagging with my name, blog address etc. I still have to figure that out .... But didn't want to delay, so am uploading lots of cards, canvas, mixed media pages etc today. Enjoy :)

Saturday, June 29, 2013

Grad !

My friends beautiful and stylish daughter just graduated, so what better stamp set to use for a card than Dylusions couture set.
Dylusions sprays made the background, then I paper pieced the dress, accenting it with white gelato. The black strip is stamped with a graduation cap from a Waltzing Mouse Stamps set, as is the congratulations.

I dont get much opportunity to make girls cards, and really appreciate when I do :-)

Flowery thinking of you

I was inspired to make this card, from a card made by Vickypgr on Youtube. She is really creative, if you wanted to check her out.

I made this card for one of my neighbours who is going through some stuff right now, she is a a wonderful gardener and there is always something in bloom in her garden.

I used a retired Stampin' Up! set called 'In Full Bloom'. I stamped the flowers onto the card and also onto scrap white cardstock. I then colored them all with my beloved copics and layered them, curling the top flowers and adding pop dots for more dimension. Doesn't it look just wonderful, so vibrant and cheery. That is a strip covered in washi tape across the middle. I would love to tell you what company makes that tape, but the names are on the packaging of washi tape, so once you discard that, you have no idea where they came from. The sentiment is from Waltzing Mouse Stamps.


Hope your day is cheery and colorful :-)

Teachers Thank You Cards

Thanking my teachers with homemade cards.

I like doing shaped cards and Spellbinders Nestabilites are perfect for that. I used some Graphic 45 patterned cardstock, Stampin' Up! real red cardstock, ink and flower ribbon. The Eiffel Tower and semtiment are both from Waltzing Mouse Stamps sets.


I recently purchased a Marianne bird die, and it was itching to be used, so I created this thank you card. Isn't that bird with the branch and leaves just adorable :-) The cardbase was naturals white Stampin' Up! cardstock, the doily is the PTI parisian doily, the sentiment and die co-ordinating stamp are from Waltzing Mouse and the flowers are from the Tim Holtz tattered flowers die. The background stamp is a retired Stampin' Up! stamp, which I stamped in versamark and then colored with perfect pearls - in real life it was a much more subtle shimmer than it appears in this photo.


Anyway, the teachers appreciated the cards, so I was happy.

Have a great day, thanks for visiting.

Mixed Media - How are you ?

I always held the belief that a scrapbook page should be done in a day, I often worked away at one page until it was done, and only then did I begin another. THEN I discovered the wonderful world of mixed media. The main issue being drying time. Yes, I can dry it with my heat tool, but I found it heats up my other pages too and whatever is on the back of the page - which I do not necessarily want. So I am enjoying not rushing, just taking my time and keeping coming back to work on a page.

My pages seem to have so many deep meanings, I want to capture my inner thoughts and feelings, things that are special or have some significance to me. Through my art journalling I can right injustices, record my memories, express myself in a way that is deep and meaningful to me.

This page is my first venture into collage. I am inspired by the work by Sandra Van Den Bogaard and others, not that I could ever produce work as wonderful as that, but what I like about mixed media is that it is so personal. So long as I like it, thats all that matters. There is no right or wrong, nice or not nice, its a totally subjective experience. I am never afraid to try new things : if it doesn't work out, then that ok, I learned something. Experimentation is soooo exciting :-)


What I wanted to portray in this page is that sometimes people are not ok ! When passing by some people and they ask you 'How are you?', they sometimes dont even pause in their stride to wait for your response. The expected response is 'good', but what if you're not ? Do you stop them and say. "Well actually, I'm having a bit of a hard time at the moment.....etc". No, you dont do that. We conceal how we feel, being dishonest with ourselves really - hence the Pinocchio nose and the little sapling growing there. It may seem to be a negative message, but its not really, its capturing reality, an everyday occurrence.

The background was sprayed with dylusions sprays, the collage was made from magazine cut outs. It takes ages looking through magazines for just the right images, then piecing them together and embellishing them with pens, crowns, eyes etc ! I think I found the perfect pair for this pages deep message. The words were stamped with an alphabet stamp, then written over with platinum liquid pearls, highlighted in black and then white pen. The edging was done with Hero Arts edge set, and the thought bubbles were using an old Stampin' Up! set.

I enjoyed the challenge of collage and will definitely be venturing here again.

Thanks for visiting, hope you found some inspiration :-)


Mixed Media Layouts - Hawaii

Since starting on this whole mixed media journey, I have really neglected some of my card making and scrapbooking supplies. Whilst some will lend themselves to mixed media, others will not. So I had to go shopping for more stuff, it was terrible, really terrible ...... as you can imagine ! LOL

I love this moleskin watercolor paper journal, the quality of the book and the shape of the pages are really amazing for some pages.

For this page I really wanted to capture the Hawaiin theme. Whenever I am in an uncomfortable position - like the dentists chair, this is the place I escape to. I can feel the breeze and so vividly remember how relaxed and content I felt, with a beautiful blue sky and ocean view.

I used my dylusions sprays as the base, then some shimmer paint with a stencil. The gesso with the same stencil and orange dylusions spray. There is so much interest and texture in the background, I love it. Then everything else was layered on top, orchids from a WMS set, stamped and colored with copics, leaves are from a hero arts set. I stamped some waves from the WMS set Free Spirits in versamark across the bottom and embossed them in clear powder. It really emphasised the blue. I doodled around the edges, colored the pattern with black marker and orange gelato, and journalled around the edgs. I highlighted the inside of the doodle with blue gelato. The image of me was printed, fussy cut and adhered with gel medium, then the outline done in Faber Castell white india ink. The lettering is from 3 sets, 'Going to' is from and old See-D's alphabet stamp set. 'MY' is from a PTI alphabet die set, and 'Happy Place' is die cut using Tim Holtz alphabet set.

I really enjoy this page, I feel its emphasized and reinforced the significance of this time and place to me. I hope you can find some inspiration to capture your favorite time or place. Thanks for visiting :-)


Friday, June 14, 2013

Kids cards

I love making cards for kids, its so much fun. It bring out my inner child I think ! lol

This was for a boys birthday. I havent used my Sizzix film strip die for ages, but its so great to frame and image. I stamped all those crazy animals and monsters and colored with my copics. I have recently sorted all my stamps into categories, 'nature', 'backgrounds', 'sentiments' etc. The largest by far is my 'animals' box ! lol.

This card is for a nature/bug party and the accompanying gift is butterfly solar lights for the garden - how fantastic is that :-) I'm sure the Birthday girl will love it.

The rose red SU cardstock was the basis for this card because I wanted the jar to stand out. I stamped the jar, from the SU set Perfectly Preserved, in white stazon onto a window sheet and die cut it. The effect is that the butterflies are flying out of the jar. But you got that - right :-)

The butterflies are from two SU stamp sets : Kindness Matters and Papillon Porpourri. I stamped them, colored them with SU markers and then clear embossed them to make them shiny. It really makes the colors pop.

The grass is from a My Favourite Things die, and some gorgeous washi tape brings all the colors together - wish the name of the company was on these rolls of tape !

Hope you like it, thanks for visiting and have a great weekend x


Monday, May 27, 2013

IN LOVE with stamp set - help !

I had seen a few samples using Dyan Reaveley's new couture stamps, and I thought they looked ok, maybe I'd tack them onto the end of my (extensive) wish list ! But then ...... I happened to spot them in a craft store ...... So I bought them ...... and haven't stopped using them since ! lol It was a pleasant surprise actually, as this really isn't my style.

They are fantastic to work with, I was doubtful I would like silicone stamps - but I do, I do ! The best thing about them is how well you can paper piece them. I had so much fun selecting papers and then highlighting and shading with my gelatos. The hats are so much fun.

The background was gesso'd and then painted with acrylic paints and a baby wipe. I stamped randomly with a background stamp, using molding paste with a stencil and a edge stamp I picked up on sale - woo hooo :-)

The meaning behind the page is about being anonymous, unknown and unacknowledged. We all feel like this sometimes, but at the moment, thats me in the grey dress with her back to you. I just want to be left alone.

Someone said I always put so much significance and hidden meaning into my pages, I guess I do, but isn't that the point of crafting in a book that is meant for you, its a way to sort your feeling and emotions and represent them in a meaningful way to you. It very personal and captures a moment in time, same as a photo, or a smell.


Wednesday, May 8, 2013

Card swap .....

At the last crafters group of the current catalogue we had a big finale party. Pot luck, games, looking through the extensive Stampin' Up! retiring list. We also had a card swap, 12 people took part and here are the wonderful creations. Inspiration for these cards was from a number of places - Split Coast Stampers thank you for your assistance here x

Everyone who took part was really happy when they left with their 12 different and individual cards. Names of creators are underneath each card.
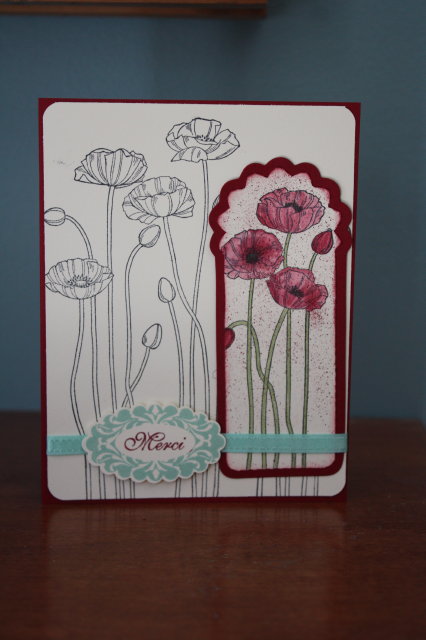
 Fiona's vintage card
 Nikki's bookmark card
 Erin's owl card
 Jen's simply sophisticated card
 Barbara's flower and bird card
 Liz's classically chic card
 Nathalie's vintage card
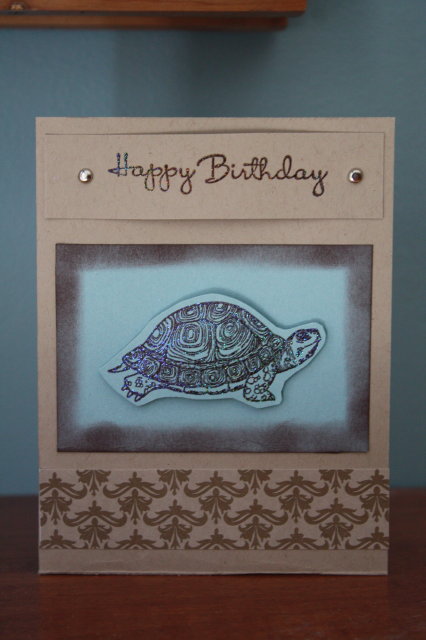
 Gisele's tortoise card
 Haidee's flower card
 Maria's 3d flower card
 Starla's pinwheel card 
Barb's big card with little stamps

New arrival card

Some friends of ours just adopted a little 2 year old boy. Its been a long wait for them and we are very happy to hear their news. We wish them a life time of happiness together xxx

I wanted to make a really special card, not too babyish, but something meaningful and significant. So here it is :

I used a Close to My Heart set for the little boy and dog, stamped in crumb cake. A nice spellbinders die coupled with a Waltzing Mouse Stamps for the sentiment - LOVE IT !!!

April Stampers Club

Focus this month was making shaped cards, an easel card and a gate fold card.

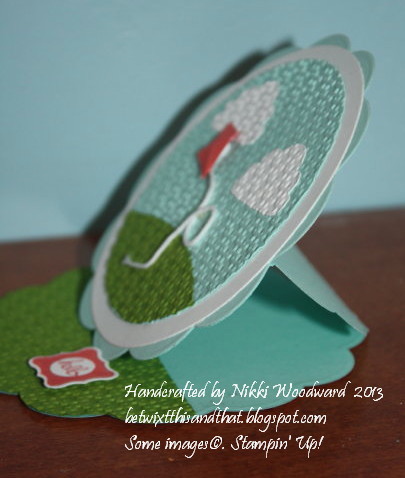
The first is an easel card. I loved doing the circular shapes for this. A tutorial can be found at : http://www.splitcoaststampers.com/resources/tutorials/easelcard/ There is a tutorial for a regular card as well as a circular one. Gotta love Beate's tutorials - thanks Beate :-)

I wanted to also demo the technique of embossing images into the background. If you can see in the sample, the clouds and grass on the circle are glued on first and then the circles was run through the big shot with the embossing folder. This technique works so much better using an embossing with small detail, like this square lattice one.

The kite was cut free hand, a couple of score lines in it for dimension and popped up. The white bakers twine is glue dotted in place.

I love to make 'just because' cards, and sending them for no other reason other than a hello, its such a nice surprise to receive one - better than occasions for really.

 Side view of the easel card, the mechanism to stand it up. I just love how dimensional it becomes and folds totally flat.

SU recipe :
Stamp set : Sale a bration set (sentiment)
Cardstock : Pool party, Lucky limeade, whisper white, calpyso coral
Embellishments : White bakers twine
Tools : Square lattice embossing folder, Glue dots, dimensionals, Big shot, Spellbinders nestabilities

For the second card, I found inspiration from Inkspiredtreasures.com.

As it is approaching the end of the school year, I thought this card would be good for a teachers card, or for a student who got a good school report. (Hopefully this will be the case here !)

I made a gate fold card, with the apple (for the teacher !!! lol) used to secure the card closed.

The books are made from the word window punch and the chalk board effect is made by using a white graphite pencil and a paper pencil to smudge the pencil. This technique was easier than white embossing and restamping with craft ink and is more effective for the school look of this card.

There was an assembly of dsp scraps available for the crafters, so everyones owl was dressed differently :)


SU recipe :
Stamp : Apple from Perfectly preserved
Cardstock : basic grey, summer starfruit, baja breeze, black, whisper white and dsp
Tools : Word window punch, Owl builder punch, Black pen, white graphite pencil, paper penxil

10 year olds Birthday

 My friends daughter just turned 10 and my new Close to My Heart fairy stamp set made its debut. I stamped the main fairy in momento black and colored with my copics. But for the small circle fairies and flowers around the main image, I stamped them in versamark and colored with chalk ink, fixing it with my own home made alcohol and glimmer spray. Hope you like it - thanks for visiting :-)

New puppy

A big shout out to my best friend Katrina's new puppy - Chloe. I loved the little punch art bone, the ratty chewed up ribbon and of course the stamped muddy footprints. Oh the joys of being a dog owner ! lol The sentiment is from a set by Scrappy Moms and it was perfect to welcome a new pup into a french speaking household
:)